
Applying waterproof silicone sealant with care leads to long-lasting results. He should start with thorough preparation, since clean surfaces help the sealant stick and prevent leaks. Choosing the right sealant matters too. Junbond JB9705 stands out as a reliable choice for many waterproof projects. People often skip steps or rush drying, but steady hands and patience make all the difference. With the right waterproof silicone sealant and attention to detail, anyone can achieve a smooth, professional finish.
Common mistakes include using incompatible products, not allowing proper drying times, skipping primer, and missing critical joints or corners.
Surface Prep for Sealant
Getting ready for a new sealant application makes a big difference in how long the results last. People often overlook surface preparation, but it sets the stage for a strong, waterproof bond. Junbond recommends following a few simple steps to get the best results with their JB9705 sealant.
Remove Old Caulk
He should always remove old sealant before starting a new project. A utility knife or a caulk remover tool works well for this job. Scraping away every bit of the previous layer helps the new sealant stick better. If any old sealant remains, it can cause peeling or cracking later. Taking time here saves trouble down the road.
Clean and Dry Area
After removing old sealant, he needs to clean the surface. Rubbing alcohol or a mild detergent helps remove oils, dirt, and soap scum. A clean surface allows the sealant to bond tightly. He should dry the area completely before moving on. Moisture can weaken the seal and lead to leaks. Painter’s tape along the edges keeps lines neat and prevents smudges.
Tip: Use painter’s tape to guide the sealant line and avoid getting excess on nearby surfaces.
Inspect for Damage
Before applying sealant, he should inspect the area for any damage. Cracks, holes, or loose materials can affect how well the sealant works. Fixing these problems first ensures a smooth, even finish. Proper surface preparation prevents future leaks and keeps the seal strong for years.
Improper surface preparation often leads to adhesion issues. Peeling or cracking can happen if the surface is not clean or dry. Taking time to remove old sealant, clean the surface, and check for damage helps the new sealant last longer and perform better.
Tools & Materials
Select Waterproof Silicone Sealant
Choosing the right sealant makes a big difference in any waterproof project. He should look for a product that offers strong adhesion, flexibility, and durability. Junbond JB9705 stands out as a top choice. This sealant features high elasticity and excellent aging resistance. It does not corrode most surfaces, so he can use it on glass, metal, concrete, or plastic-steel materials. JB9705 bonds well to many building materials and comes in several colors, including transparent, black, grey, and white. People often use it for indoor and outdoor jobs, from curtain walls to decorative joints. For those searching for the best caulk for waterproofing concrete, JB9705 delivers reliable results.
Tip: Pick a sealant that matches the color and material of the surface for a seamless look.
Gather Application Tools
He needs the right tools to apply sealant smoothly. A caulking gun helps control the flow and keeps the bead even. Painter’s tape creates straight lines and protects nearby surfaces. A caulking tool or a smoothing tool shapes the sealant and removes excess. Gloves protect his hands from sticky residue. Some people use a cartridge opener to make starting easier. For cleaning, isopropyl alcohol works well. Closed-cell backer rods fill large gaps before sealing. A sealant remover tool helps with old caulk removal.
Essential tools for sealant application:
·Caulking gun
·Painter’s tape
·Caulking tool or smoothing tool
·Gloves
·Cartridge opener
·Isopropyl alcohol
·Closed-cell backer rods
·Sealant remover tool
Safety Gear
Safety matters during any waterproofing job. He should wear gloves to protect his skin from chemicals. Safety glasses shield his eyes from splashes. A mask helps if he works in a space with poor ventilation. Keeping the workspace clean and organized reduces accidents.
Note: Always read the product label and follow safety instructions before starting.
How to Apply Silicone Sealant
Applying silicone sealant can seem tricky, but anyone can get a neat, waterproof finish by following a few simple steps. Junbond JB9705 makes the process easier thanks to its smooth flow and reliable curing. Here’s how he can tackle the application like a pro.
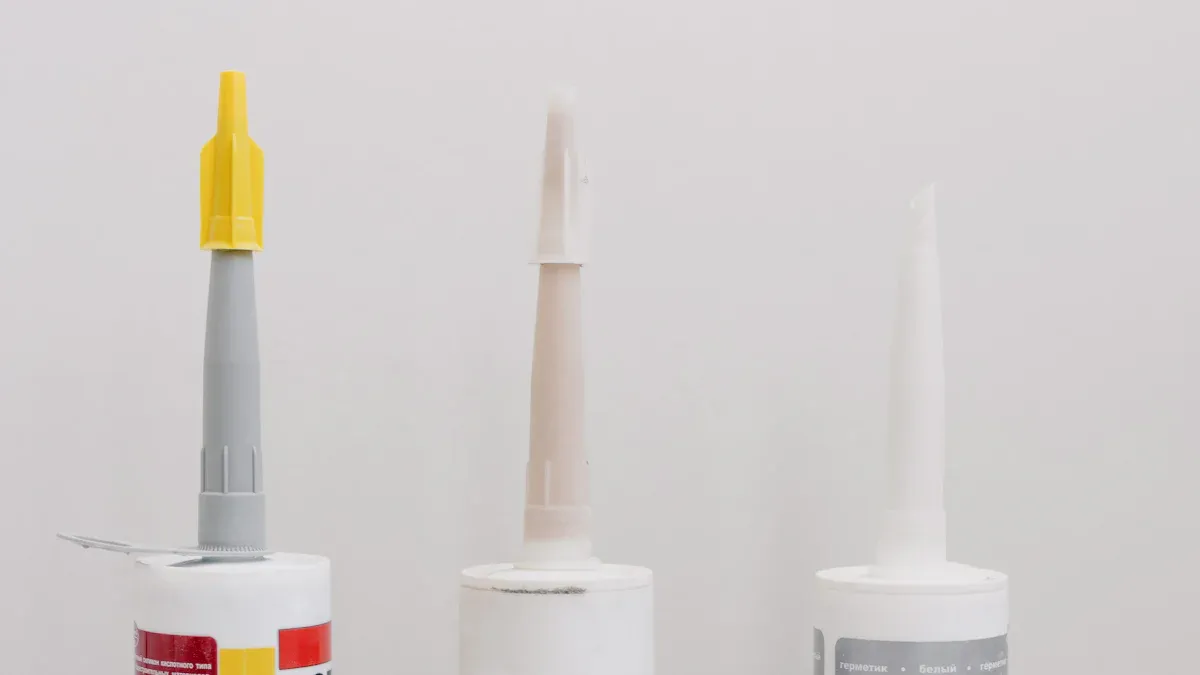
Cut Nozzle at 45 Degrees
He should start by preparing the tube. Most silicone sealant tubes come with a tapered nozzle. To get the right bead size, he needs to check the gap he wants to fill. Using a marker, he can mark the spot to cut—usually about 1/8 to 1/4 inch from the tip for small gaps, or a bit wider for larger joints. Slicing the nozzle at a 45-degree angle gives better control and helps create a cleaner bead. After cutting, he should pierce the inner seal using a long nail or the puncture tool on his caulking gun. Testing the flow on a scrap surface helps make sure the bead size is just right.
Tip: Cutting at an angle lets him apply silicone sealant smoothly along corners and edges.
Load Caulking Gun
Next, he needs to load the caulking gun. He should check the cartridge for the expiration date and remove the cap and foil seal. Pulling the plunger rod back, he inserts the cartridge, then pushes the rod forward until it fits snugly. Testing the trigger ensures the sealant flows without air pockets. This step helps prevent uneven application and makes the job easier.
Apply Even Bead
When he’s ready to apply silicone sealant, steady hands matter. He should hold the gun at a consistent angle and squeeze the trigger gently. Working in small sections helps keep the bead even. Using painter’s tape along the edges creates straight lines and protects nearby surfaces. The ideal bead size depends on the gap, but cutting the nozzle at a 45-degree angle helps control the width. He should move slowly and keep a steady pace to avoid lumps or gaps.
·Maintain steady pressure for a uniform bead.
·Use painter’s tape for crisp lines.
·Work in small sections for better control.
Junbond JB9705 flows smoothly, making it easier to apply silicone sealant without mess. Its neutral-curing formula starts to set quickly, so he should avoid stopping mid-way.
Smooth for Clean Finish
After laying down the bead, he needs to smooth the sealant for a professional look. A wet finger or a smoothing tool works well. He should keep the work area clean to avoid dust or debris sticking to the sealant. Removing painter’s tape right after smoothing helps create sharp edges. If he sees any gaps or uneven spots, he can add a little more sealant and smooth again.
·Use a damp finger or caulking tool to smooth the sealant.
·Clean up excess before it dries.
·Remove tape promptly for a neat finish.
Junbond JB9705 cures with moisture in the air, forming a flexible and durable seal. The curing process usually takes about 24 hours, but warmth and humidity can speed things up. He should avoid touching or disturbing the sealant during this time to let it set properly.
Note: Smoothing the sealant right away prevents ridges and keeps the finish looking clean.
By following these steps, he can apply silicone sealant with confidence. Junbond JB9705’s easy application and reliable curing help anyone achieve a waterproof seal that lasts.
Sealant Application Tips
Work in Small Sections
He gets better results by working in small sections during sealant application. Tackling one area at a time helps keep the bead even and prevents the sealant from drying out before smoothing. Junbond recommends starting with perfect surface preparation. He should clean away dirt, oils, and old sealants before beginning. This step ensures the waterproof bond lasts longer. When he loads the sealant gun, he avoids overfilling to keep the application neat. Steady pressure and slow movement help him control the amount of sealant. Smoothing each section right after application gives a clean finish.
·Clean the surface before starting.
·Remove all old sealant and dirt.
·Apply steady pressure for a smooth bead.
·Smooth the sealant quickly for best results.
Use Masking Tape for Lines
Masking tape makes sealant application look professional. He places tape on both sides of the gap to guide the bead and prevent the sealant from spreading. This technique keeps the lines straight and stops excess sealant from getting onto unwanted areas. After finishing the application, he removes the tape while the sealant is still wet. The result is a crisp, neat edge that looks great in any waterproof project. Junbond JB9705 works well with this method, giving him confidence in the final appearance.
Tip: Remove masking tape right after smoothing the sealant to avoid pulling up the bead.
Layer for Large Gaps
Sometimes, he faces wide joints or gaps that need extra attention. Instead of trying to fill the space in one go, he applies the sealant in layers. He lets each layer cure before adding the next. This approach prevents sagging and ensures the sealant bonds well. For very large gaps, he uses a backer rod before starting the application. Junbond JB9705’s high elasticity makes it ideal for layering, so he can trust the seal to stay strong over time.
| Step | Action | Benefit |
|---|---|---|
| Clean Surface | Remove dirt and old sealant | Better adhesion |
| Use Tape | Guide application | Neat, straight lines |
| Layer Sealant | Fill large gaps in stages | Strong, lasting seal |
He finds that following these tips leads to a professional finish every time. Junbond sealant helps make the process easier and more reliable.
Curing & Aftercare
Allow Proper Curing Time
He should let the sealant cure fully before exposing it to water or heavy use. Under standard room conditions, waterproof silicone sealant needs about 24 hours for initial curing. Full cure can take up to 7 days, depending on thickness and humidity. Junbond recommends checking the product label for specific curing times. Rushing this step can weaken the bond and reduce the effectiveness of the application. Patience pays off with a strong, lasting seal.
Tip: If the room feels cool or damp, he should expect the curing process to take a little longer.
Protect During Curing
After finishing the application, he needs to keep the area safe from dust, pets, and curious hands. Covering the joint with a loose plastic sheet or keeping windows closed helps prevent debris from sticking to the sealant. He should avoid touching or pressing on the bead while it cures. If the project is outdoors, he can shield the area from rain or direct sunlight. Junbond JB9705 forms a flexible seal, but only if it cures undisturbed.
·Keep pets and children away from the work area.
·Use barriers or covers to protect the fresh application.
·Avoid cleaning or scrubbing until the sealant is fully cured.
Clean Excess Sealant
Cleaning up after application keeps the project looking neat. He can use a razor blade or utility knife to loosen the edge of any excess sealant. Once an edge lifts, he should peel the silicone back over itself to reduce residue. For stubborn bits, a plastic scraper works well and prevents scratches. Rubbing alcohol or mineral spirits help remove leftover residue. A microfiber cloth polishes glass surfaces for a clear finish.
·Mechanical removal works for large pieces.
·Chemical removal helps with tough residue.
·Always test solvents on a small area first.
Junbond makes cleanup easier with its smooth formula, so he spends less time tidying up after each application.
Mistakes to Avoid
Everyone wants a smooth application, but common mistakes can ruin the results. Junbond sees these issues often, so learning how to avoid them helps anyone get a professional finish.
Skipping Prep Steps
Skipping surface preparation is one of the most common mistakes. He might think a quick wipe is enough, but that leads to problems later.
·Contamination like soap scum or oils can stop the sealant from bonding.
·Old sealant left behind, even in small amounts, disrupts adhesion.
·Mold or paint residue can weaken the waterproof barrier.
·Moisture trapped under the sealant prevents proper curing.
He should always clean with a degreaser or solvent and make sure the area is dry before starting the application.
Wrong Sealant Choice
Choosing the wrong sealant for the job is another common mistake. Not all products work for every surface or condition.
·Using the wrong sealant can cause cracking.
·Leaks may appear if the sealant cannot handle movement.
·Some joints become unpaintable, which affects the look.
Junbond JB9705 offers strong adhesion and flexibility for many surfaces, making it a reliable choice for waterproof projects. For roofing, specialized sealants are necessary because they resist UV and handle movement better.
Over/Under Applying
Applying too much or too little sealant creates problems.
·Over-applying leads to messy joints and wasted product.
·Under-applying leaves gaps, which lets water in and weakens the seal.
He should check the gap size and cut the nozzle to match. Working in small sections helps control the application and avoids these common mistakes.
Rushing Curing
Rushing the curing process is a mistake that many people make.
·The seal’s integrity suffers, leading to leaks and moisture problems.
·Weak spots form if the bonding process gets interrupted.
·Temperature and humidity affect how long curing takes.
·Testing the seal too early gives false results.
He should let the sealant cure fully before exposing it to water or stress. Junbond recommends patience for the best waterproof protection.
Tip: Taking time with each step prevents common mistakes and helps the application last longer.
Achieve a Professional Finish
Smoothing Techniques
He wants every waterproof project to look sharp and last. Smoothing the sealant right after application makes a big difference. Junbond recommends a few simple steps for a polished finish:
1.Prepare the surface so it is clean and dry.
2.Use a caulking gun to lay down a smooth, even bead at a 45-degree angle. Steady pressure helps keep the line straight.
3.Shape the sealant with a wet gloved finger or a smoothing tool. This step removes ridges and gives the joint a neat look.
4.Let the sealant cure for about 24 hours, following the manufacturer’s instructions.
A clean finish not only looks professional but also helps the sealant perform better over time.
Check for Gaps
After the sealant sets, he should inspect the area for missed spots or uneven lines. Gaps can let water in and weaken the seal. Here’s how he can check and fix them:
1.Remove any old sealant and make sure the joint is dry.
2.Protect nearby surfaces with a drop cloth or kraft paper.
3.Clean the gap with a vacuum and a damp cloth, then let it dry.
4.Mask the edges with tape for a crisp line.
5.Insert a backer rod if the gap is deeper than 1/4 inch.
6.Cut the nozzle at a 45-degree angle to match the gap width.
7.Run a continuous bead with steady pressure.
8.Shape the sealant within 5-10 minutes using a smoothing tool.
9.Pull the tape off while the bead is still wet.
10.Wipe away excess sealant before it skins over.
He finds that careful inspection and touch-ups keep the waterproof barrier strong.
Regular care helps the sealant last longer. Junbond suggests these easy maintenance tips:
·Clean the sealant gently with mild soap and water. Avoid harsh chemicals.
·Wipe silicone strips with a soft cloth to remove dust and grime.
·Inspect for cracks, peeling, or discoloration. Fix problems right away.
·Remove old sealant completely before reapplying.
·Use diluted hydrogen peroxide for mold instead of bleach.
·Follow the manufacturer’s maintenance recommendations.
He keeps the waterproof seal strong by checking it often and cleaning it gently. Good maintenance means fewer repairs and a longer-lasting finish.
He can achieve a professional finish with every waterproof project by following these steps:
1.Clean the surface and remove old sealant.
2.Apply the sealant evenly with a caulking gun.
3.Smooth the sealant for a neat look.
4.Allow the sealant to cure fully.
| Factor | Why It Matters |
|---|---|
| Surface Preparation | Ensures strong adhesion and prevents peeling. |
| Correct Technique | Delivers a lasting, flexible seal. |
Junbond JB9705 makes the application process simple and reliable. When he follows these tips, the sealant protects against leaks and keeps repairs to a minimum.
FAQ
How long does it take for silicone sealant to cure?
He should let the sealant cure for at least 24 hours before exposing it to water. Junbond recommends waiting up to 7 days for a full cure, especially in cool or damp conditions.
Can he use Junbond JB9705 to seal gaps in concrete?
Yes, he can use Junbond JB9705 to seal gaps in concrete. This product bonds well to many surfaces and creates a flexible, waterproof seal that lasts.
What are common concrete caulking errors to avoid?
He often sees people skip cleaning or use the wrong product. These common concrete caulking errors lead to poor adhesion and leaks. Junbond suggests always cleaning the area and choosing the right sealant for the job.
How can he achieve a smooth waterproof sealant application?
He should work in small sections, use painter’s tape for straight lines, and smooth the bead right after applying. Junbond JB9705 makes waterproof sealant application easier with its smooth flow and strong adhesion.
Is there a best way to handle silicone sealant application indoors?
He should ventilate the area, wear gloves, and keep surfaces clean. Junbond JB9705 works well for indoor silicone sealant application and does not corrode most materials.
Post time: Dec-10-2025